Features : WiFi-Hotspot
Public WiFi Hotspot
This is the most intresting part. Now a days Public Wifi Hotspot is gaining popularity. Although it is very intresting there is much more complexity inside,
- Creating User Account,
- Veryfying user's KYC( Know Your Customer) norms as enforced by Goverment,
- Recharge and Topup customer account,
- Collecting Payments from users, since WiFi-Hotspot users are in mobile. He may come and go often.
As you believe, neuCRM has the solution for all above.
On neuCRM,
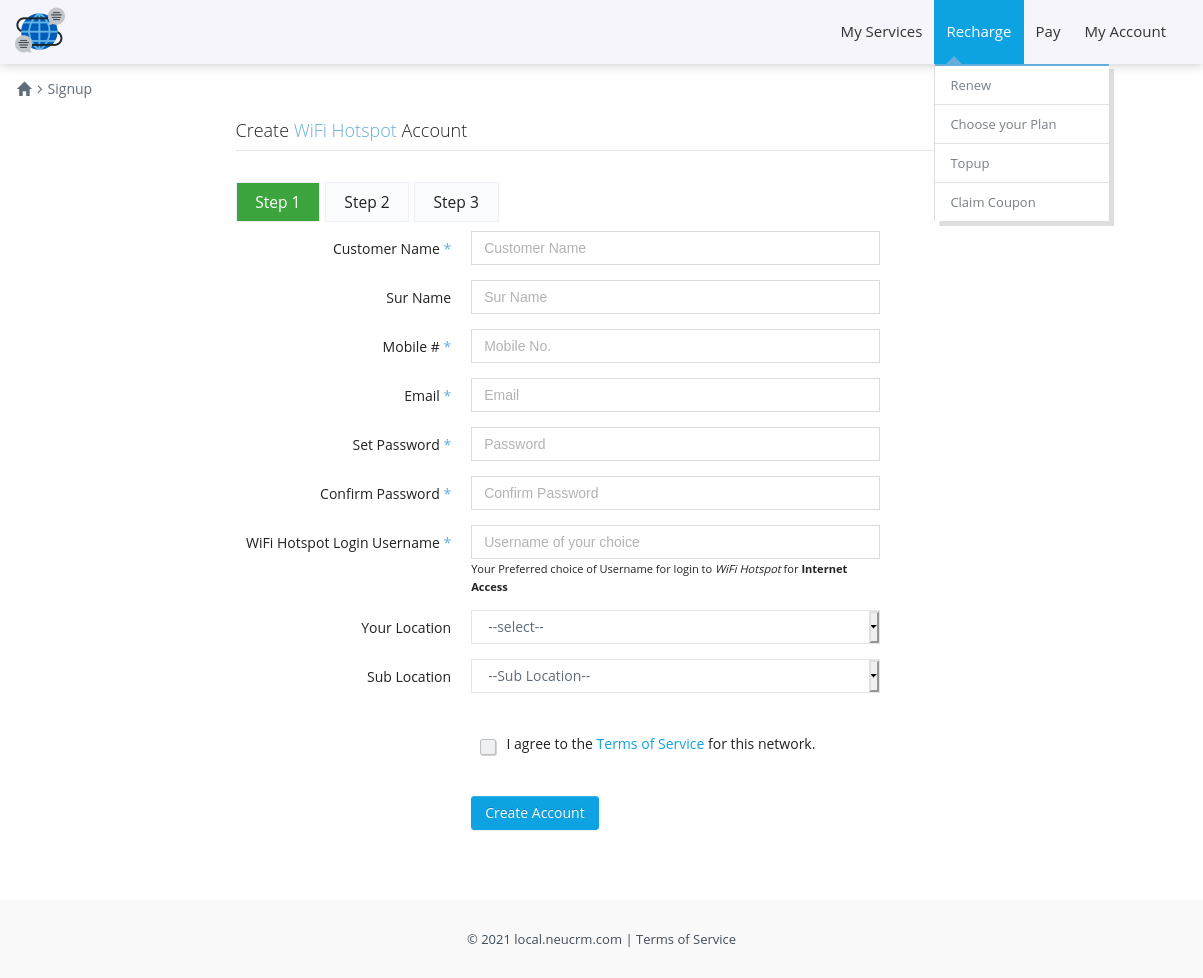
- WiFi Hotspot User Account can be created by the user by self registration.
- Optionally, User's Mobile Number & Email ID verified through OTP (One Time Password).
- On Seccessful OTP verification(if OTP verification enabled), user is provided with a loginid & password for managing his Account
- By login with his loginid, User can Recharge, Topup and Pay bills Online. And even he can upgrade his Internet Package/Plan by himself through online portal.
- You can deploy multiple Hotspot location, still your customer get connectivity accross all your Hotspot locations with his single loginid.
We hope, neuCRM will greatly assist you to improve your WiFi Hotspot Business.
Requirements for WiFi Hotspot setup
- Hotspot Capable NAS. Ofcourse Mikrotik Router OS is the best choice for WiFi-Hotspot.
- neuCRM server.
- Get your own domain name(optional) for customer selfcare portal. Configure as like
myaccount.yourdomain.com. Please Refer Configuration Section of this document for how to configure domain name. - If you enabled OTP verification in CRM Admin panel, Configure & Enable the SMS & Email in neuCRM for sending OTP to customer while self registration
- Configure Online Payment Gateway (optional), if you want to collect money online. To Add Online Payment Gateway Go to Admin → PG → Add. The Most famous Payment Gateway in your Country may be already Integrated. You can choose from list, and Enable it. If wish you to add any new Payment Gateway, which is not already there in neuCRM, please contact our support team, we will integrate it for you.
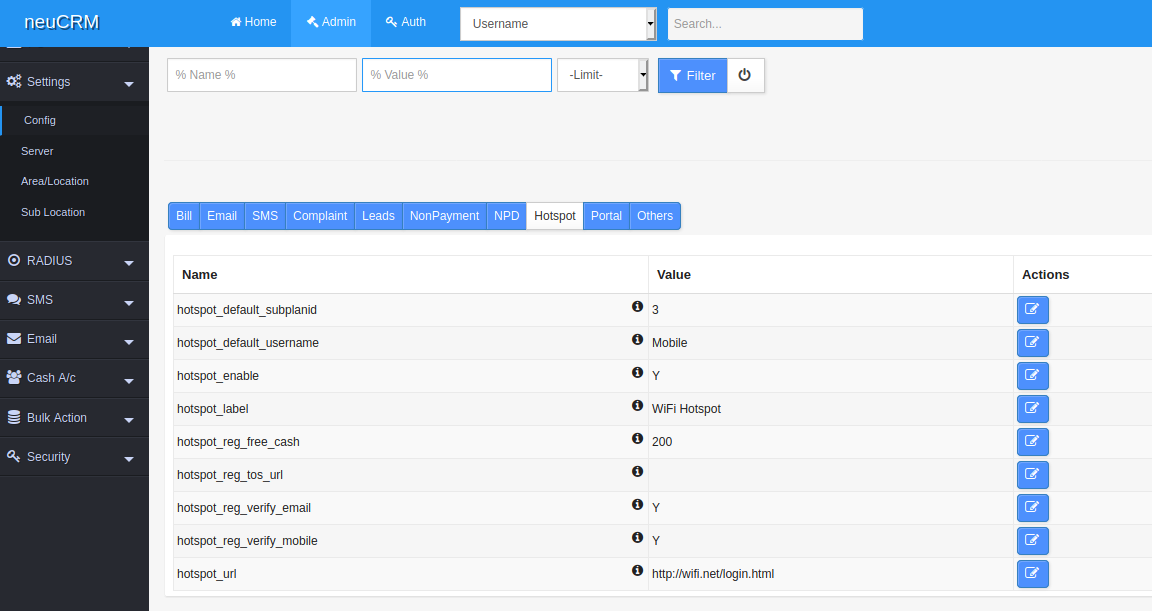
- Create a Plan (atleast one) for WiFi-Hotspot users in neuCRM, and configure the
hotspot_default_subplanidparameter to your newly created Plan's SubPlan ID. Please note that it is SubPlan ID, Not Plan ID. - Sample Configuration Looks like this
- Configure walled garden to allow access to your portal URL:
myaccount.yourdomain.com, and any other if required.
Steps to setup WiFi Hotspot
Ensure you have fullfiled the all above Requirements, then proceed to set up WiFi-Hotspot service.
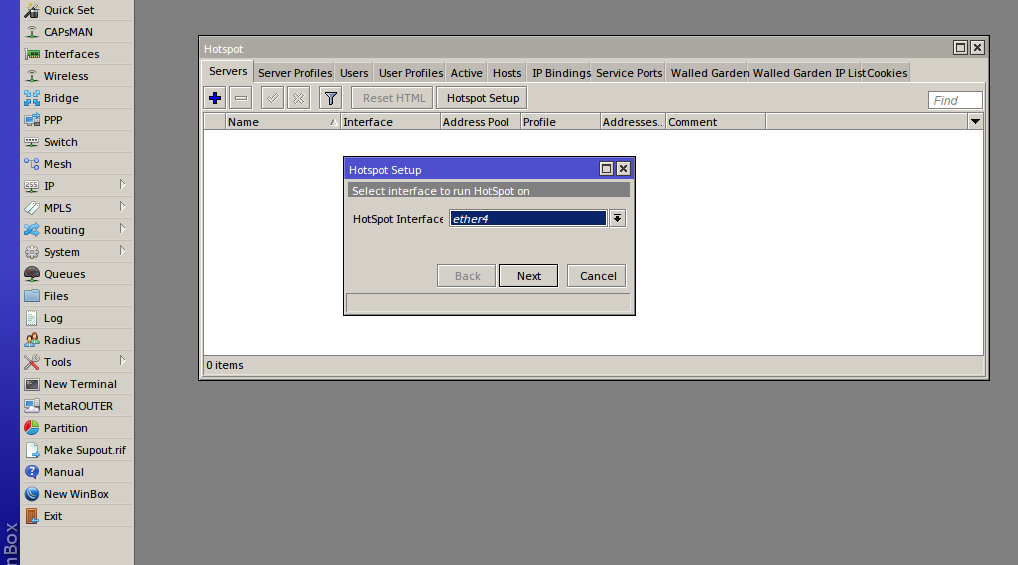
- Configure your NAS for WiFi-Hotspot.
- Setup a open WiFi Network, and setup connectivity with your NAS. So that your users are freely allowed to connect to your wifi network and complete self registration.
- Enable and Configure Radius authentication in your NAS (router).
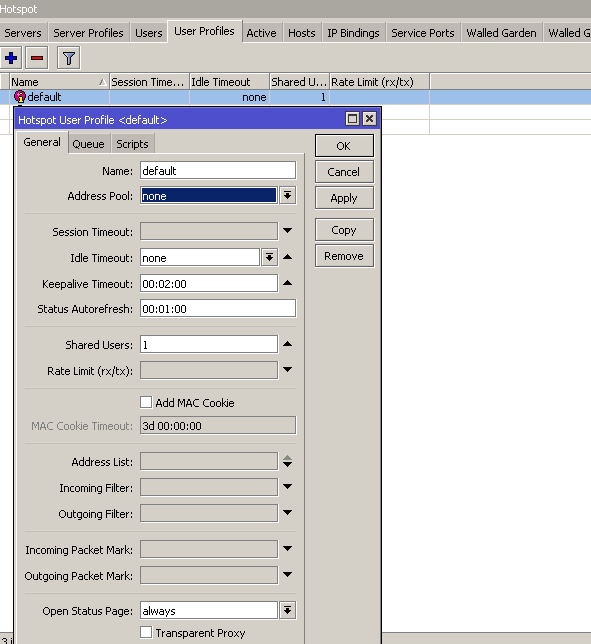
- Please note that, Set Address Pool to None on user profiles.
- Value in Shared-Users is used to determine how many users can login with the same username at the same time. You may change as per your Requirements.
- Please Note down your DHCP pool IP list. You have to add a NAT rule for
masqueraderule in firewall. So that Hotspot cliets are allowed to access Internet - The firewall NAT rule is
- You can use our custom Hotspot Login/Status/Logout page. We have prepared a custom HTML template for Mikrotik Hotspot. You may freely download here. Unzip the file, and upload the
hotspotdirectory into Mikrotik Router. - You need to edit the
config.jsonfile, which is available in root(/) directory of the downloaded mikrotik-hotspot.zip. The main purpose theconfig.jsonto automatically embed the ISP ID and Reseller ID in the Self-Registration URL :http://portal.mydomain.com/user/signup. - The
config.jsonfile will be in the following format. Please Carefully edit this file.{ "portal_base_url": "http://portal.mydomain.com:8080", "logo_path" : "logo.png", "ispid" : 2, "resellerid" : 1, "location_code" : "LOC1", "sub_location_code" : "SLOC1" }Please note that, after editing the config.json file, the contents should be valid JSON format. Other wise it won't work.
Here portal_base_url and logo_path fields are mandatoty. location_code and sub_location_code are optional. If you configure location fields, while customer self-registration it won't be asked.
With help of this json file, signup URL will be generated dynamically as in the format of
http://portal.mydomain.com/user/signup/{ispid}/{resellerid}/{location_code}/{sub_location_code}. For example, the URL generated in above case ishttp://portal.mydomain.com/user/signup/2/1/LOC1/SLOC1. This is to identify the user, to create account under which ISP and Franchisee. You can use above URL structure in your Websites, Social media to invite the customer to do Self registration. - Replace the LOGO and URLs of your neuCRM server configuration. Thats all no more configuration required in Mikrotik side.
- For uploading HTML template into Mikrotik, you may Login via FTP Client (Filezilla). If you need further help for how to upload html files to mikrotik, please google and you may find nice tutorial.
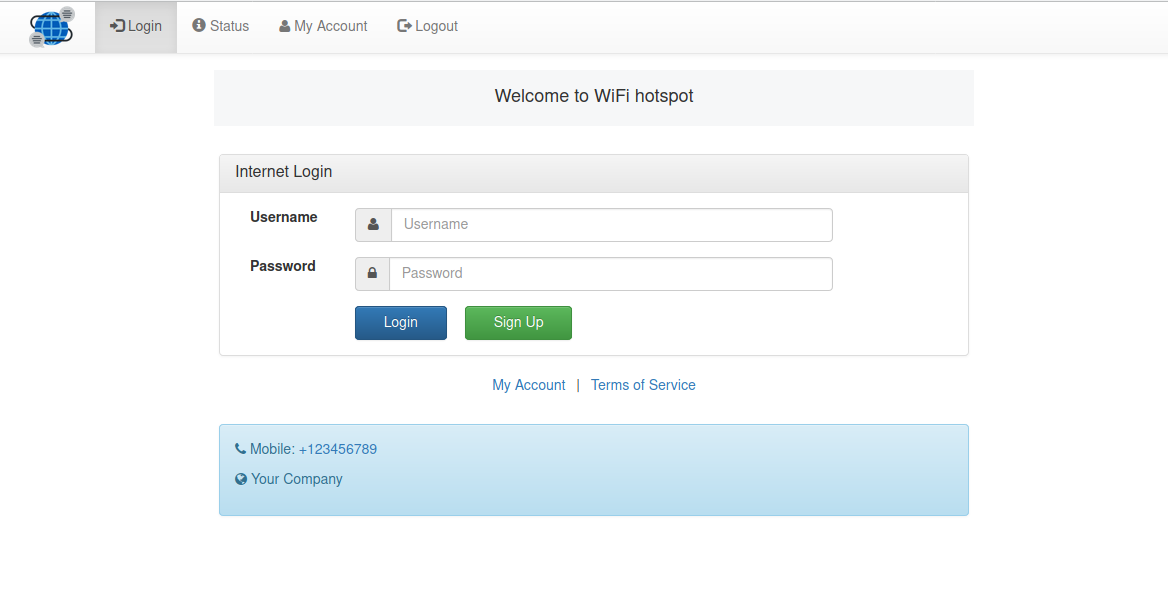
- The Login Page of the above template looks like this
- When the user clicks on Registration link, the user will be redirected to Registration page.
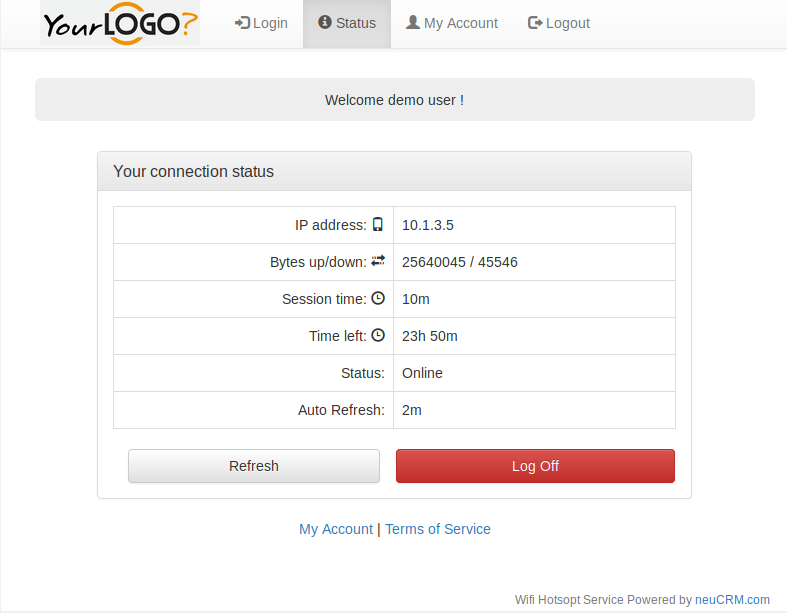
- Status Page will be looks like this
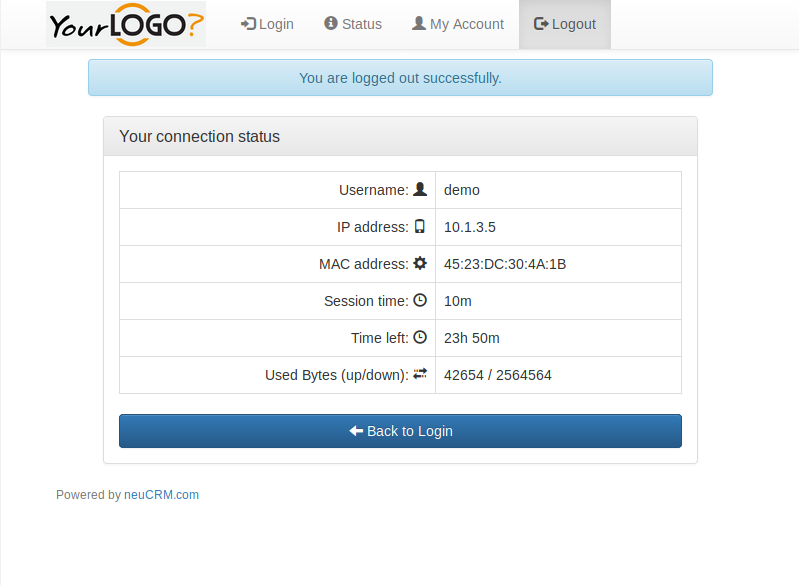
- And After Logout
- If you enabled Email & Mobile Number verification via OTP in CRM Configurations, the registered user will be asked for OTP which was sent to Mobile & Email. The OTP verfication won't asked, if not enabled in CRM Admin panel.
- On Successful Registration, Login details are emailed to user's Registered Email.
- If you want to keep the visited sites log(s) of users in neuCRM, please configure WebAccess Log in your NAS.
 /ip firewall nat
add action=masquerade chain=srcnat comment="masquerade hotspot network" \
src-address=10.1.3.0/24
Here in above example the subnet 10.1.3.0/24 is my DHCP pool for Hotspot Clients
That's all, your WiFi-Hotspot service is ready now.